Affordable bathroom flooring transforms your space without draining your budget. Smart material choices and creative DIY techniques deliver stunning results at a fraction of the cost.
Budget-friendly flooring options have surged in popularity as homeowners discover stylish alternatives to expensive tile and stone. Manufacturers now produce affordable materials that mimic high-end finishes with impressive accuracy.
A bathroom floor upgrade instantly refreshes the entire room, making walls and fixtures look cleaner and more intentional. Even a small flooring change creates a dramatic visual impact that elevates your whole interior.
1. Peel-and-Stick Vinyl Tiles

Peel-and-stick vinyl tiles deliver a sleek, modern floor with zero professional installation costs. They come in stone, geometric, and wood-look finishes that mimic high-end materials convincingly.
Clean your existing floor thoroughly before starting, then plan your tile layout using a chalk line for straight alignment. Press each tile firmly from the center outward to eliminate air bubbles.
2. Painted Cement Geometric Floors

Painted cement floors with geometric patterns transform a plain surface into a striking bathroom feature. Bold shapes like triangles, hexagons, and diamonds create visual depth and a designer-quality finish.
Use a concrete primer before applying floor paint to ensure strong adhesion and long-lasting color. Tape clean geometric shapes with painter’s tape, then fill each section with contrasting floor paint colors.
3. Warm Wood Laminate Floors
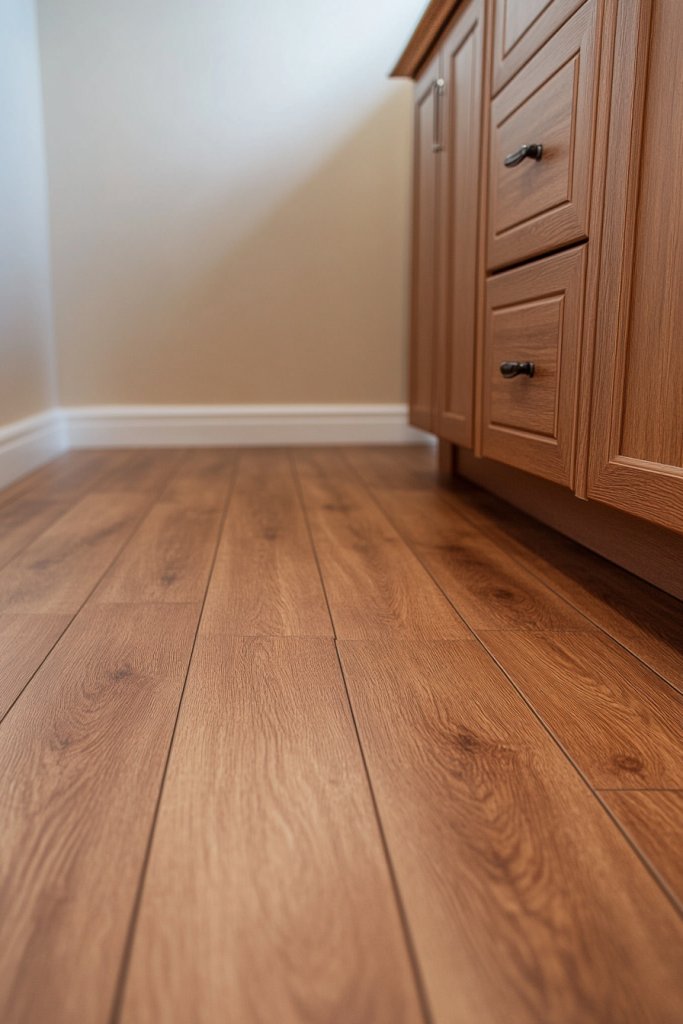
Affordable laminate flooring in warm wood tones brings natural warmth and texture into any bathroom space. Honey oak, walnut, and chestnut finishes create a cozy, inviting atmosphere that cold tile cannot replicate.
Choose a moisture-resistant laminate specifically rated for bathroom environments to prevent warping over time. Install a foam underlayment beneath each plank to add cushioning and reduce noise underfoot.
4. Black and White Checkerboard Tiles

Classic black and white checkerboard tiles bring timeless elegance and graphic boldness to any bathroom floor. This pattern suits vintage, Art Deco, and modern farmhouse interiors with equal sophistication and charm.
Choose ceramic or affordable vinyl checkerboard tiles to achieve this look within a tight renovation budget. Keep walls and fixtures neutral to let the floor pattern stand as the room’s dominant design statement.
5. Reclaimed Wood Look Vinyl

Reclaimed wood look vinyl planks deliver rustic character and warmth to bathroom floors without the moisture risks of real timber. Distressed grain textures, knot details, and aged color variations create an authentic weathered appearance.
Select a waterproof luxury vinyl plank product rated specifically for wet bathroom environments before purchasing. Install planks in a staggered brick pattern to enhance the rustic, natural appearance of the reclaimed wood effect.
6. Eco-Friendly Cork Bathroom Floors

Cork flooring offers a soft, warm surface underfoot that makes cold bathroom mornings significantly more comfortable. Its natural texture and earthy tones suit organic, biophilic, and Scandinavian interior design styles beautifully.
Seal cork tiles with a waterproof polyurethane finish before installation to protect them from bathroom humidity and splashes. Choose a medium or dark cork tone to better conceal water marks and everyday bathroom floor stains.
7. Patterned Vinyl Sheet Flooring

Patterned vinyl sheet flooring covers an entire bathroom floor in one continuous piece, eliminating grout lines completely. Bold floral, Moroccan, and geometric prints create strong visual interest without requiring individual tile installation.
Measure your bathroom floor precisely and add several inches of extra material on each side before cutting. Use a floor adhesive around the perimeter and seams to prevent edges from lifting in humid conditions.
8. DIY Stenciled Tile Effect

A DIY stenciled tile effect transforms plain painted floors into intricate, handcrafted-looking bathroom surfaces. Repeating Moroccan, geometric, or floral stencil patterns create the illusion of expensive encaustic tiles on a minimal budget.
Apply two coats of floor paint as a base color and allow each coat to dry fully before stenciling. Secure your stencil with painter’s tape and use a dense foam roller to apply contrasting paint cleanly across each repeat.
9. Ceramic Mosaic Tile Accents

Ceramic mosaic tile accents create vibrant, artistic bathroom floors using small, affordable ceramic pieces arranged in patterns. Swirling color combinations, random patchwork designs, and geometric arrangements all produce unique handcrafted floor surfaces.
Source discounted or surplus ceramic tiles from salvage stores and home improvement outlets to reduce material costs significantly. Mix grout colors intentionally to highlight your tile arrangement and add another layer of visual detail.
10. Bright Linoleum Bathroom Floors

Linoleum flooring in bright, trendy colors refreshes bathroom interiors with bold, cheerful energy and surprising durability. Terracotta, sage green, cobalt blue, and mustard yellow options suit contemporary, retro, and maximalist interior styles beautifully.
Choose a sheet linoleum product for seamless installation that eliminates moisture entry points between individual floor pieces. Pair a bold linoleum color with white walls and simple wooden accessories to balance the room’s overall visual energy.
11. Industrial Concrete Look Coating

Concrete look floor coatings create a raw, industrial bathroom aesthetic without the weight or cost of real poured concrete. Smooth grey finishes with subtle tonal variation suit minimalist, industrial, and Japandi interior design styles perfectly.
Apply a concrete floor coating kit over clean, primed existing flooring using a roller for consistent, even coverage throughout. Work in thin layers, allowing each coat to dry fully before applying the next to prevent cracking or peeling.
12. Patterned Carpet Tile Comfort

Patterned carpet tiles bring unexpected softness, warmth, and color into bathroom spaces traditionally dominated by hard flooring materials. Bold geometric and abstract patterns create a cozy, stylish surface that suits eclectic and contemporary interior design approaches.
Choose moisture-resistant, low-pile carpet tiles specifically designed for bathroom or utility room environments before installing. Clean and dry your subfloor thoroughly to ensure each tile adheres firmly and lies completely flat against the surface.
13. Upcycled Pallet Wood Floors

Upcycled pallet wood floors create a genuinely unique bathroom surface with rustic charm and strong eco-friendly credentials. Natural grain variations, knots, and tonal differences across individual boards produce a characterful, one-of-a-kind floor finish.
Source heat-treated pallets marked with HT certification to ensure the wood meets safe indoor use standards. Sand each board thoroughly to remove splinters, then apply multiple coats of waterproof floor sealant to protect against bathroom moisture.
14. Wide Plank Vinyl Flooring

Wide plank vinyl flooring creates an open, spacious feeling in bathrooms by reducing the number of visible seams across the floor. Broad planks draw the eye along the room’s longest dimension, visually stretching compact or narrow bathroom layouts effectively.
Lay wide planks parallel to the longest wall in your bathroom to maximize the room-expanding visual effect. Choose a lighter plank color for small bathrooms to reflect more light and prevent the floor from visually shrinking the space.
15. Faux Stone Vinyl Tiles

Faux stone vinyl tiles replicate the natural texture and color variation of slate, travertine, and sandstone at a much lower cost. Subtle surface embossing and realistic matte finishes create a convincing natural stone appearance across the entire bathroom floor.
Choose a faux stone tile with varied tonal shading across each piece to increase the floor’s natural, authentic appearance. Install tiles in a staggered pattern rather than a straight grid to further enhance their organic, stone-like visual effect.
16. Non-Slip Adhesive Cork Tiles

Adhesive cork tiles provide a non-slip, insulating bathroom floor surface that combines safety, comfort, and natural visual appeal. Their textured surface grips wet feet effectively, reducing slip risks in a room where moisture constantly creates hazardous conditions.
Press adhesive cork tiles firmly onto a clean, level subfloor, starting from the room’s center point and working outward. Apply a waterproof sealant coat over the entire installed surface to protect the cork from standing water and humidity.
17. Bold Epoxy Floor Coating

Colorful epoxy floor coatings transform plain bathroom floors into glossy, bold statement surfaces with remarkable visual impact. Vibrant color options including deep navy, forest green, and terracotta create a dramatic, high-shine floor that anchors the entire room.
Prepare your existing floor by cleaning, repairing cracks, and applying an etching solution before mixing and pouring the epoxy. Work quickly once the epoxy mixture activates, spreading it evenly with a notched squeegee across the entire floor surface.
Choose one affordable flooring idea that suits your bathroom’s style and start your transformation this weekend. Small flooring changes create the biggest visual impact in any home interior.